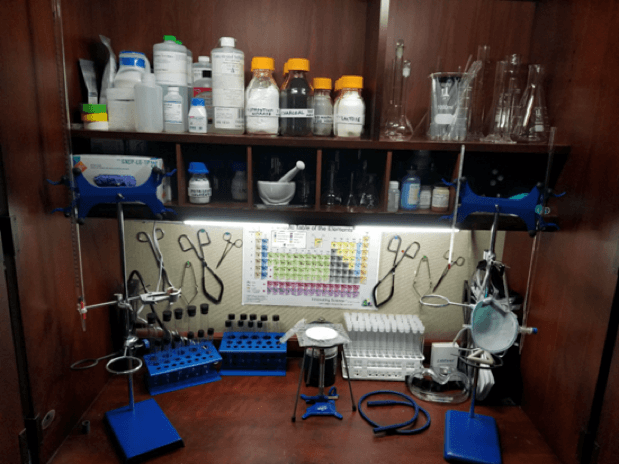
Not everybody has access to a professional chemistry lab, so setting up a home chemistry lab is your best bet if you want to do chemistry experiments at home.
Chemistry is an experimental science, and the best way to enjoy it and learn about it is performing experiments. No matter if you are a hobby chemist or a parent that wants to enjoy learning about chemistry with your kids.

There are countless chemistry experiments for kids that can be educational and safe. On this matter, make sure to check out some already assembled chemistry kits for kids (and adults!)
Doing experiments goes a long way for inspiring kids to get interested in science!
Maybe you are just a science enthusiast. In any case, this guide is certainly for you, we have the best recommendations for setting up a home chemistry lab.
We have a huge selection of materials listed and described in this review, but if you want to skip right through it and just check out my best recommendation, you can just check out this set of glassware:
Keep reading if you want something more specific. This is basically what we will cover in this post:
Introduction: Can You Really Do Chemisty Experiments at Home?
I have been working on a professional level lab for several years. But my passion for chemistry started by just doing chemistry experiments at home. Mixing salt and water in plastic beakers that I found sitting around my house. My love for chemistry evolved over time, and I got my hands on a good collection of glassware and chemicals, mostly ordered online. This is probably the simplest way to set up a home chemistry lab easily and cheaply.
When I was just getting started, (before taking university level chemistry courses), I was overwhelmed by the possibilities. Now, ten years later, I decided to put together this guide. This will be as close as possible to what I would have loved to read when my interest in chemistry started to grow.
Disclaimer: This is not intended nor will disclose any information regarding the preparation or manipulation of illegal/dangerous substances. Relevant safety considerations will be pointed out throughout the guide.
Safety First: Basic Personal Protective Equipment (PPE)
No dangerous experiments will be described on this guide, but the use of basic PPE should come as natural as breathing when working in chemistry. Even I, a professional chemist, wear my safety glasses all the time even when performing the most trivial tasks in the laboratory (even just sitting around talking with a colleague).
You do not really need anything fancy, some goggles such as these will work perfectly to keep your eyes safe:

Besides from safety glasses, it is always good to have at hand some protective gloves. Any kind of nitrile or latex cleaning gloves in the supermarket will fit the purpose of handling most chemical substances that you will use doing chemistry experiments at home. I am not going to lie, a lab coat might seem like overkill in many cases, especially if you are just performing chemistry experiments for kids, but it is always handy to prevent things to spill and ruin your clothes. It does not have to be anything expensive to fit this purpose.

Keep Record of your Chemistry Experiments in a Lab Notebook
This is the cornerstone of scientific research and experimentation, making notes about observations. Plan clearly beforehand what you are going to do, write down the “recipe” of what you “mixed together”, record what happened, when and how. Then try to rationalize why it happened afterwards, and write it down. As simple an observation or a way to add an “ingredient” as it may seem, I can assure you will not remember it properly in a few days. It happens to the best of us. For this purpose, any lab notebook will work, as long as it is resistant. You can browse some examples in the pictures below, or just visit our post about choosing the best lab notebook.

Defining the Space for your Home Chemistry Lab Set Up
Even if the materials you use for your chemistry experiments are not very harmful, it is a good practice to clearly define a working area in your house. If you live in a small flat, any table as far from where you keep your edibles would do. I used to use my bathroom when I was a kid (it was my only option), but if you have a ventilated garage, a shed, or even better, an outdoors zone, that would be a great place. You usually want a source of tap water and electricity close-by. Try to keep it to that working zone, or “lab bench”, it will not only be safer, but it will make it easier to handle everything.

Essential Equipment for a Home Chemistry Lab
So you are almost ready and cannot wait to set up your first chemistry experiment at home. What do you need? Of course, you need lab equipment. Specifically, glassware and plasticware are the usual options. Borosilicate glass is better because it allows heating, and in most cases it will be easier to clean and last longer in good shape. As long as you don’t break it!
If you really want to take this seriously and you want to make your life easy, here is your perfect solution. Get your hands in a bit of everything you need. A starting chemistry glassware set will set you on track. Out of the ones that I found online this seems to be the best for the purposes of setting up a lab for doing chemistry experiments at home, just click below to see more details and grab your own chemistry set:
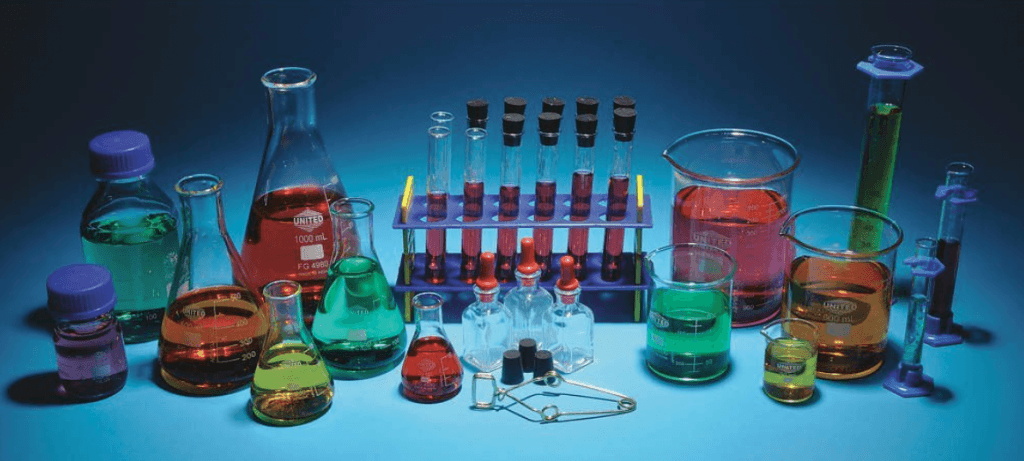
This set gathers essential items. Beakers, Erlenmeyer flasks, volumetric cylinders, glass bottles, test tubes (and its racks), stoppers, a metal clamp to heat things up, a glass rod for stirring mixtures, glass pipettes and some other things. This is basically everything that someone wanting to set up a home chemistry lab needs to begin with, so it is my first recommendation and a safe bet.
But maybe you want to buy some specific things. So here are my basic recommendations for doing chemistry experiments at home.
The Most Basic Chemistry Glassware
Before starting: Keep in mind that you can always take a look at our guide of chemistry flasks if you notice something missing, or if you want to identify a piece of glassware that is sitting around in your garage.
The first must have: beakers. Glass beakers are the bread and butter for doing chemistry experiments at home, extremely multipurpose. Check out the set below if you are interested:

Coming up second, the Erlenmeyer flask. Just like beakers, but can be better for specific situations, for example, for shaking mixtures without spilling. Get your hands on some Erlenmeyer flasks, it is an absolutely essential item in any home chemistry lab.

The Best Accessories for a Home Chemistry Lab
It is always extremely handy to have a metal support stand, and especially with some clamps attached to it. These are multipurpose and once you get used to them you will not be able to live without one. Basically it allows holding flasks while you work with them. This is an example of a support with clamps and retort rings:

While not so common to test reactivity in professional set ups, one of the best things to have a round in a home chemistry lab is a plastic rack with some glass test tubes, with its corresponding rubber cap. This is the absolutely best way of, as its own name says, test things! Just toss reagents in the tube, add a solvent and shake it. The rubber stoppers will prevent contamination, and allow shaking without spilling a drop (always be aware of possible overpressure building when working with closed systems, though!).

And this pretty much summarizes the basic requirements. Of course the possibilities on equipment are endless, and as you progress on your home chemistry experiments, you may want to purchase more advanced or specific equipment. See the appropriate section below to explore the next level.
Gathering Basic Chemicals for your Home Lab
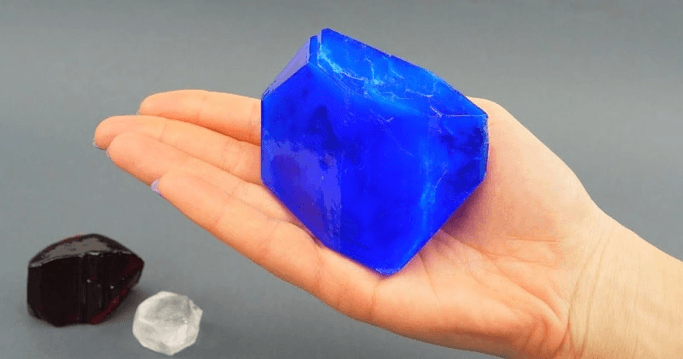
I will start with an honor mention: my favorite “home-level” chemical for doing fun experiments, copper sulfate (CuSO4). This beautiful blue solid is not harmful, and is usually employed as algae control agent in swimming pools. But the nice thing about it is the beautiful crystals that you can make with it:

They look beautiful, don’t they? Well, keep reading, I will share with you a procedure to make them in the “your first chemistry experiment at home” section. Get your hands on some of copper sulfate:

Now that I got my baby blue out of my chest, let’s talk about typical chemicals that you can obtain in supermarkets, grocery stores or hardware stores.
The Most Basic Chemicals in a Home Lab
- Distilled water. Regular tap water will work for most chemistry experiments performed at home, but you can easily get your hands in a bottle of distilled water in hardware stores.
- Organic solvents. Such as acetone (great for cleaning up glassware, we spend gallons of it every day in our lab), or toluene mixtures (paint thinners) can be also accessed through hardware stores. Also alcohol (ethanol or isopropanol) of decent purity can be acquired in any pharmacy or most supermarkets.
- Common acids such as hydrochloric acid, can be bought in supermarkets, and are extremely common reagents. If concentrated, they should be handled with special care, always wearing safety glasses and gloves. If you get a spill with an acid (or a base, for that matter), rinse with plenty of water and if it hurts or stings, don’t hesitate to go see a health professional.
Another very common chemical is sodium hydroxide. You can buy water solutions, but in my opinion is easier to just buy it as a pure solid (NaOH) and dissolve the amount you need. This reagent has plenty of home applications, besides doing experiments for fun or educational purposes: Sodium hydroxide, or lye, can be used to unclog drains, or even better, to make you own soap.

Useful Household Chemicals
Your usual best bet is looking for household chemicals. To list some more:
- NaCl (sodium chloride), also known as table salt. It also works for growing crystals, but not as pretty as the ones made with copper sulphate.
- Borax, or sodium borate, can be found in many department stores.
- Vinegar: It is actually an aqueous solution of acetic acid. White is probably purer.
- NaHCO3 (sodium bicarbonate), or baking soda, is a very mild base. It reacts with acetic acid on vinegar, and a typical chemistry experiment for kids is making a volcano with baking soda and vinegar.
The list could go on forever. We will list the specific reagents that you will need, and how to find them, in each post about doing chemistry experiments at home.
How to Properly Store your Chemicals
You need appropriate containers to store your reagents. This prevents any contamination, which can go either way (contaminate your precious chemicals or contaminate yourself with them). In terms of storage of solid chemicals, or small amounts of liquids I recommend you to get some screw-cap glass vials:

To store large quantities of liquids, glass storage bottles are a must:

Make sure to get a good permanent marker, or a set of labels, so you can always label every container and make sure what is inside, or how much.
More Advanced Equipment and Set-Ups
Two of the most basic operations in a chemistry laboratory are flitration and ditillation.
Filtration is separating a solid from the liquid that it is suspended on. You can get away with a regular coffee filter and filtering paper, but if you really want to go pro-mode, this filtration kit, with your own vacuum pump, provides everything you need for a very reasonable price:

The most famous operation or experiment in a chemistry lab is a distillation. A distillation is basically the process of separating mixtures of liquids with different boiling points, or level of volatility. This is a extremely educational experiment for kids, and has found many applications in home chemistry labs, such as distillation of essential oils. There is so much that you can do with a distillation kit that I will revisit this experiment in a future post. In the meantime, you can get your hands in a proper distillation, which is not particularly expensive. Of course, to hold it up, you will probably want to have also a support and clamps (see the basic section above).

Gearing Up to the Next Level
A stirring plate with magnetic stirring bars is literally something that you use every day in a professional chemistry laboratory. Although you can get away with a glass stirring rod, the joy of automatic stirring is difficult to overcome, especially if you want to run a chemical reaction at home that takes a significant amount of time to complete (some chemical reactions are virtually instantaneous, but others can take several hours, or even days!). Apparently, small stirring plates are not particularly expensive.

Furthermore, you probably also want to have some extra magnetic stirring bars around, like that you can stir different containers using the same plate.

This is how stirring plates work:
Accurate Weighing your Chemicals
Finally, a balance that allows you to weight your reactants for your chemistry experiments comes in very handy. You don’t need to go for a super precise professional analytical balance. Any food balance will do, just don’t mix it up with your actual balance for food in the kitchen… You can grab some cheap kitchen balances here:

I will close this section now, though I could really go on forever. I will revisit home chemistry equipment in the future, probably in each post about specific home chemistry experiments in which I will mention what material you are going to require.
Your First Chemistry Experiment at Home
You are almost ready to start having fun. I promised before a nice experiment to start with. One beautiful thing that you can do in chemistry is growing crystals. Some compounds, especially inorganic salts, tend to be able to crystallize easily, and you don’t need a huge set of glassware. Just one or two beakers, a piece of cardboard, some strand to hold the seed crystals, and of course, the material you are going to crystallize. I recommend you to go for the good old copper sulfate (CuSO4).
Copper sulfate is a nice blue solid that crystallizes very easily from saturated solutions in water. In the corresponding section I gave you the link to buy copper sulfate and some beakers. You would be all set with that!
There are plenty of visual guides online about the procedure that you must follow, so check out the following video:
Where do I Go Now? Further Reading and Final Remarks
If you purchased some of the material discussed on this post, you will be ready to carry out many chemistry experiments at your own home! Stay tuned for more content on specific experiments, but you can go ahead a check some experiments in chemistry textbooks. I strongly recommend Illustrated Guide to Home Chemistry Experiments: All Lab, No Lecture, by R. B. Thompson. It’s been on my shelf since it was published 10 years ago, and I absorved it from cover to cover. Take a look at it below!

Another cool technique that you might want to introduce at your home lab is thin layer chromatography, so feel free to check this other guide.
Feel free to ask for any further orientation that you need, or information about any experiment in the comments. Best of look and good chemistry!


Leave a Reply