
For many, the idea of science is lost on them. They may not think it’s possible to do anything fun at home or may worry that their kids aren’t going to be impressed. However, there are many science experiments to do at home with your kids.
Although we usually focus on just chemistry experiments, sometimes in specific experiments to run with your kids you can find many things, but electronics, physics, and chemistry are three of the most popular types available. Also, if you are an adult and a science enthusiasts, there are also pro experiment kits available for you.
The good news is that you can find cool experiments to do at home with household items. That means you don’t have to spend a lot of money and can raid the kitchen for the things you need.
Diet Soda and Mentos Volcano
This one’s a classic.
If you’re looking for cool science experiments, then this is the right one for you. Just remember that it can be quite messy, so you should do it outside or in the bathroom where it is easier to clean. However, it is non-toxic, so it’s safe for kids.
What You Need for this Science Experiment
- Test tube/sheet of paper
- Diet soda in a 2-liter bottle
- Roll of Mentos candy
- Index card
- Mop (to clean up)
The first step is to gather all of your supplies. It is possible to substitute other candy for the Mentos, but they do work better. Regular soda can also be used, but the eruption is likely to be much stickier.
Stack the candies. To do that, you should use a sheet of paper or test tube to form a single column of candy. Put the index card over the sheet of paper at the end so that the candy doesn’t fall out before you’re ready for it.
Open the bottle of diet soda. Remember that the eruption is going to happen fast. Make sure things are set up and that you can back away after releasing the candy.
Once you’re ready, put the roll of candies over the bottle and remove the index card to release them. Let the eruption begin!

Why It Works
Whether it’s for a school project or you’re looking for science experiments for high school kids, this project is excellent. It works because of a physical process instead of a chemical reaction.
Soda has a lot of carbon dioxide dissolved, giving it the fizz. When Mentos are added, the bumps on the candy’s surface allow more carbon dioxide to stick (as we covered in one of our 100 chemistry facts).
More and more of these molecules are going to accumulate, creating bubbles. The candy is heavy and sinks, so it interacts with the carbon dioxide down to the bottom while the bubbles expand as they start to rise. The accumulation of bubbles while the candy starts dissolving, results in the formation of foam.
With all that pressure, a geyser erupts, and the foam is funnelled through the narrow opening.
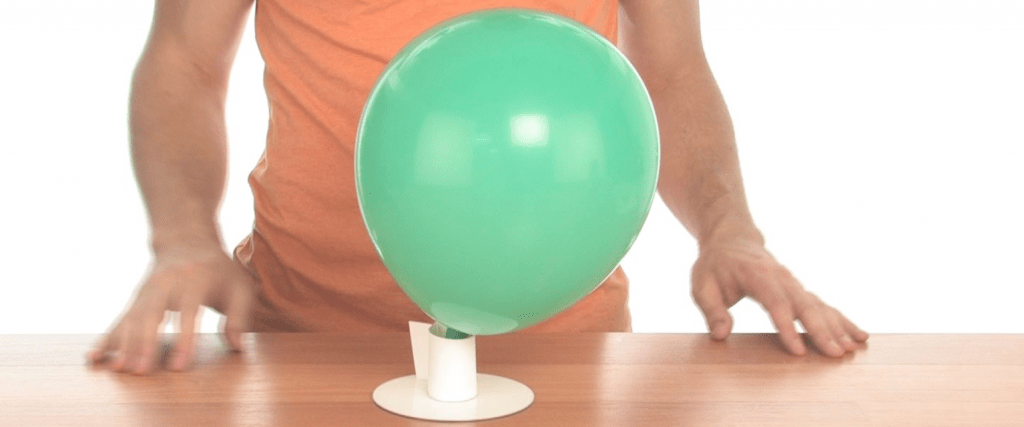
Building a Hovercraft Vehicle
If you want amazing science experiments with everyday materials, then consider making a hovercraft. This focuses on physics because the device glides over a flat surface without falling from gravity. It works by moving cushions of air, which are created by fans at the back of the vehicle. There is a skirt beneath it, which traps air and causes it to rise. An engine and fan propel it forward. Instead of a fan here, it uses a balloon.
You’re going to need:
- A CD (Compact Disc)
- Pop-top cap from a dish soap or water bottle
- Hot glue gun
- Balloon
Glue the bottle cap over the CD’s center hole and let it dry. All the edges of the CD’s inner hole should be sealed. Next, push the pop-top closed. Now, blow up the balloon, holding it to prevent air from escaping. Stretch the balloon’s mouth over the cap without losing any air. Adjust your balloon so that it stands centered and straight.
Set your newly made hovercraft on a table and open up your pop-top. Nudge the device a little and let it go.
Building an Electric Motor
Most people think of motors in cars, but they’re in your home. For example, if you have a washing machine, refrigerator, or use a fan, they all have motors. You can make a simple motor for an electronics science experiment, and you only need a couple of magnets (neodymium magnets, usually employed for magic tricks, are pretty cheap) and a few other things.
You’re going to need a few things that you might have to purchase. They include:
- Magnet wire (about 50 inches)
- Sandpaper
- Neodymium magnets (3)
- Jumbo paper clips 1.5-2 inches long
- Compass
- Dowel, ½ inch in diameter (or the cap from a felt-tip marker)
- Scissors
- Ruler
- Cardboard (2×3 inches)
- C-cell battery (2)
- Masking or electrical tap
How to Build Your Own Electric Motor at Home
At one end of your magnet wire, measure 1.6 inches and start winding it about 10.5 times around your cylinder. Cut it with scissors, leaving 1.6 inches free. You must do this evenly and neatly. If it’s not, the weight isn’t going to be distributed evenly, and the experiment isn’t going to work correctly.
Slide your magnet loops off of the cylinder. The coil could look square or circular at this point. Make sure the loops stay bunched together. Thread the free ends of the wire through the coil loops at the 9 and 3 o’clock positions. Make sure the wire ends are straight. This is the axle on which the electromagnet is going to spin.
If necessary, remove the insulating enamel coating from the ends of your wire to create an electrical contact between the support and axle. You can use the sandpaper to do this. Don’t press too hard because the wire might break. Make sure that on the right axle, you only strip half of the coating off the top. On the left one, remove all of the coating.
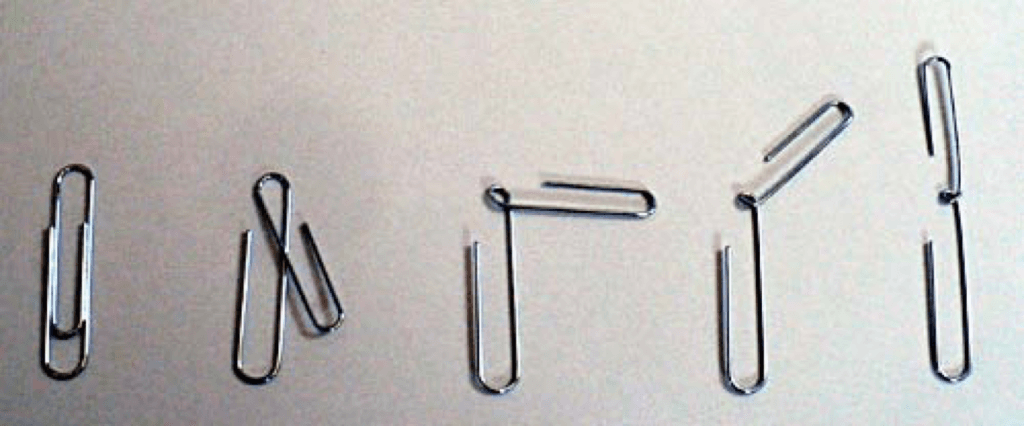
Bend your two paperclips to create the structure shown below:
Tape one paperclip to the positive end of your C battery. Make sure the bigger loop goes around the bump and secure it with tape. Secure your other paperclip to the negative end in the same way. Tape this one in place.
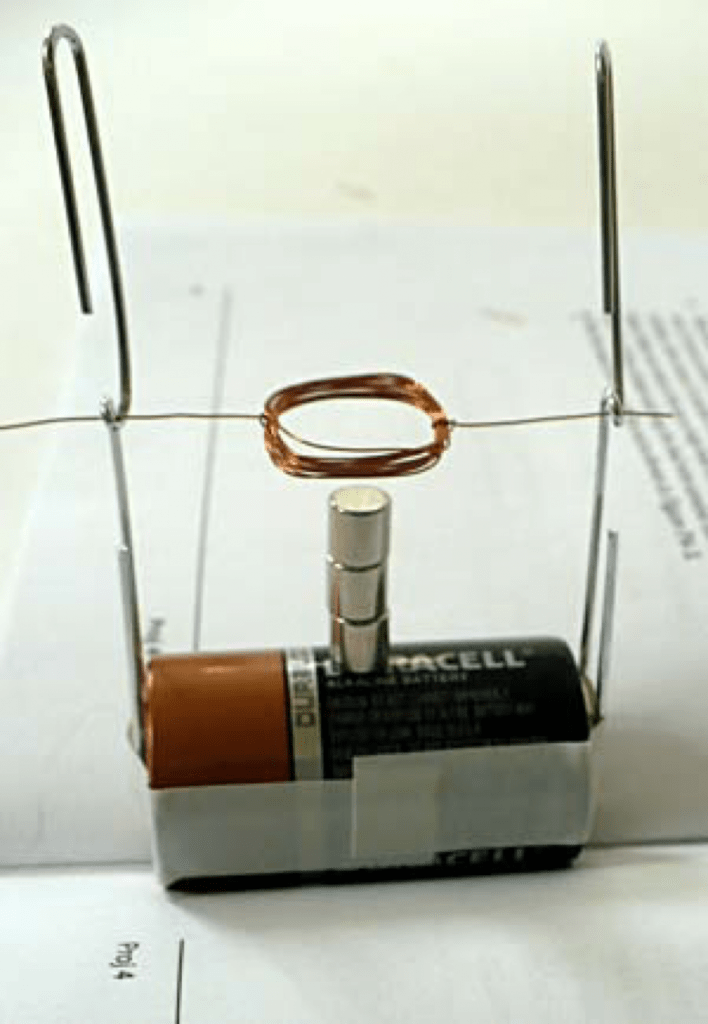
Open a book and balance the battery in the folds, so the axle supports face upward. Put three small neodymium magnets on the battery on top of each other in the middle. Insert the axle ends into the loop of the support. Let the motor run!
A video is worth a thousand words, so here you go:
To Sum Up
It can be quite fun to try out science experiments for kids at school. We provided three different options, including electronics, chemistry, and physics.
Some are easier than others, but they can all be used to teach your children about science while they have fun.
If you want to move one step further, gear up and get one of the best science kits for teens out there. Stay tuned for reviews of kits for kids and adults. For sure this is a great way to engage in educational activities: always be on the look for fun DIY easy science experiments to do at home!
And finally, by all means, do reach out in the comments if you have any ideas or suggestions!


Leave a Reply